Usage
Click the overlay toggle button to activate it. A solid (e.g. ball)
can now
be selected to overlay it with the currently active part of the tree
(the
ball will be visible only where it does not intersect with the currently
active part of the tree). The new selected solid will be placed at
the
right side of the currently active part of the tree.
Comments
The main reason for using overlay is to determine the visibility of
transparent objects that are inside or touching one another. The
order in
which they are overlaid determines their visibility.
One of the following functions has to be activated in order to deactivate
overlay: new/fix solid, union, group, subtract or intersect.
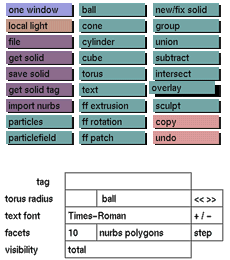
This function can be used in combination with the following buttons: ball, cone, cylinder, cube, torus, text, ff extrusion, ff rotation, ff patch, get solid, import nurbs, particles, particlefield and spline-skin.
The example shows a glass with some liquid in it. In order to make sure that the liquid always touches the glass, the liquid has been made slightly larger than the inside of the glass. The glass on the left was added
to the
liquid using overlay, while in the example on the right the liquid
was
added to the glass using overlay. The latter example is what one
would
expect, though there is nothing wrong in doing it the other way around.
To
change the order quickly, use switch in the view tree submenu.
Please note that it is possible to animate overlaid objects in the
same way
as any other object.
See also
undo, new/fix solid, group, union, subtract, intersect, switch in the view tree submenu
Example
Glass added to liquid

Liquid added to glass